How to Remove Watch Links at Home: Step-by-Step Guide
Yes, you can remove watch links at home. Most standard metal bracelets take 10–30 minutes, cost nothing beyond a few basic tools, and require no watchmaking experience. The main risks are scratches from slipping tools, lost collars, and stripped screws — all avoidable with the right setup. Most bracelet adjustments run under 15 minutes with inexpensive tools when you work carefully and over a tray. The one rule that matters most before you start: remove one fewer link than you think you need, test the fit, and only then decide if another link needs to come out.
Quick checklist before you start:
- Can I do this? Yes, for standard push-pin, screw, and collar-style bracelets. Stop if you see a proprietary mechanism, ceramic links, or a luxury bracelet with no visible removal arrows.
- Time estimate: 10–30 minutes for a standard adjustment.
- When to stop: stripped screws, seized pins, no visible arrows, or a bracelet under active warranty — take it to a pro.
Key Takeaways
Most metal bracelets can be resized at home in under 30 minutes with basic tools, provided you work carefully, remove links incrementally, and verify reassembly before wearing.
| Point | Details |
|---|---|
| DIY is viable for most bracelets | Standard push-pin, screw, and collar bracelets can be resized at home in 10–30 minutes. |
| Remove one fewer link first | Test the fit before removing more — you can always take out another link, but replacing a damaged one is difficult. |
| Tool fit prevents damage | A misaligned pin pusher or wrong-size screwdriver is the most common cause of scratched and deformed links. |
| Balance the clasp | Remove the same number of links from each side so the clasp stays centered and comfortable. |
| Wynwoodblvd sizing support | Wynwoodblvd offers pre-shipment sizing guidance and direct support for customers who prefer professional help over DIY. |
Table of Contents
- What tools do you need to remove watch links?
- How to set up your workspace before you start
- How do you know which type of bracelet link you have?
- Step-by-step removal and reassembly for each link type
- Can you remove watch links without any tools?
- How to fine-tune fit, balance the clasp, and do a final check
- Common mistakes and how to fix them
- When should you take the watch to a professional?
- Expert tips from watch technicians
- A note on why patience matters more than tools
- Prefer professional sizing? Wynwoodblvd has you covered
- Sources
What tools do you need to remove watch links?
You don’t need a full watchmaker’s bench. A small, purpose-built kit covers everything.
Core tools:
- Pin pusher or link remover (a tapered metal rod that fits into the pin hole)
- Bracelet holder or vise (keeps the bracelet stable while you push)
- Micro flat-head screwdrivers (for screw-link bracelets)
- Fine-point tweezers (to catch collars and small pins)
- Small hammer or mallet (for push-pin systems)
- Soft cloth or microfiber pad (protects the case and bracelet finish)
- Small dish or tray (holds pins, collars, and screws so nothing rolls away)
A dedicated watch link removal kit — holder, pusher, and small hammer — makes the job cleaner and safer than improvised substitutes. If you plan to adjust more than one bracelet, a kit costing under $15 is worth it.
Safe household substitutes:
| Tool | What it does | Household substitute |
|---|---|---|
| Pin pusher | Pushes the pin out of the link | Push pin, thumbtack, or sewing needle |
| Bracelet holder | Holds the bracelet steady | Folded cloth or a binder clip on a table edge |
| Micro flat driver | Turns screw-link screws | Precision eyeglass screwdriver |
| Small hammer | Taps the pusher | Back of a spoon handle (light taps only) |
| Tweezers | Retrieves collars and pins | Fingernails or a toothpick |
Pro Tip: Wrap the jaws of any household clamp or clip with tape before use. One slip on bare metal leaves a scratch that no amount of polishing fully removes.
How to set up your workspace before you start
A stable, well-lit surface prevents most accidents. Lay a soft cloth or microfiber pad flat on a table — this protects the dial and case if the bracelet shifts. Place a small tray or bowl next to your work area before you open a single link; pins and collars are tiny and will vanish into carpet instantly.
Orientation matters. Most metal bracelets have small arrows stamped on the inside of the links. Those arrows point in the direction you push the pin out. Get this wrong and you’ll jam the pin rather than release it. Hold the bracelet under a bright light or use a magnifying glass to find the arrows before touching any tool to the bracelet.
If this is your first time, take a short video of the bracelet from the inside before you start. Capture the arrow direction, the clasp position, and the overall link layout. That footage is useful if you need to reassemble from scratch, and it’s proof of condition if a warranty question ever comes up.
Keep spare pins, collars, and screws in the tray throughout the job. Losing one collar mid-process means the bracelet can’t be reassembled until you source a replacement, which can take days.
How do you know which type of bracelet link you have?
Identifying your link type takes about 30 seconds and determines everything about how you proceed.
- Push-pin (friction pin): Look for small arrows on the inside of the links. No screw slot, no visible collar. The pin slides out when pushed from the arrow side.
- Pin-and-collar (tube system): Similar to push-pin but the pin is held by a small cylindrical collar at one end. You’ll see a tiny tube or sleeve at the edge of the link.
- Screw links: A small flat-head or Phillips screw is visible on the side of the link. Common on heavier stainless steel bracelets.
- Quick-release / press-button: A small lever or button on the spring bar releases the bracelet from the lug. Common on modern sport watches and some designer bands.
- Proprietary mechanisms: No visible arrows, no screw slots, no standard spring bar. If you can’t identify the mechanism from the list above, stop and consult the brand or a watchmaker.
If you see a tiny threaded screw on the link side, follow the screw workflow. If you see arrows and no screw, follow the push-pin workflow. When in doubt, DIY resizing is possible but luxury or proprietary mechanisms often need professional service to avoid scratches or structural damage.
Step-by-step removal and reassembly for each link type
Friction push-pin bracelets
- Lay the bracelet on your cloth with the inside facing up. Locate the arrows on the links you plan to remove (usually the links closest to the clasp).
- Position the bracelet holder or folded cloth so the link hangs slightly over the edge, giving the pin room to exit.
- Place the pin pusher tip directly on the center of the pin — centered, not angled. An off-center pusher tip can scratch or deform the link permanently, so take a moment to confirm alignment before tapping.
- Tap the pusher gently with the small hammer. Use light, controlled taps. The pin should begin to slide out on the opposite side.
- Use tweezers to pull the pin fully free. Set it in your tray.
- Repeat on the matching link on the other side of the clasp so the clasp stays centered.
Reassembly: Slide the pin back in from the side opposite the arrow direction. Push until it sits flush on both sides. A pin that protrudes even slightly will catch on your wrist.
Pin-and-collar (tube) systems
- Follow steps 1–4 above. As the pin exits, a small collar or sleeve will also come free — hold your tray directly under the link to catch it.
- Keep the collar with its pin. They are often sized specifically to that link position.
- To reassemble: slide the pin back through the link, then seat the collar over the pin end before pressing it flush.
Screw-link bracelets
- Identify the screw slot on the side of the link. Match your screwdriver tip exactly to the slot width — a loose-fitting driver rounds the screw head.
- Turn counterclockwise to loosen. Some screws use a low-strength threadlocker from the factory; gentle, steady pressure breaks it free without stripping.
- Once the screw is out, the link slides free. Set the screw in your tray immediately.
- Reassembly: apply a tiny dab of removable threadlocker when reinstalling screw links so the screw won’t back out during wear but can still be removed later. Tighten until snug — do not overtighten.
Pro Tip: Never use a hammer on a screw-link bracelet. Tapping a screw that’s partially engaged strips the thread in one hit.
Quick-release and press-button systems
- Locate the small lever or notch on the spring bar inside the lug area.
- Press the lever inward with a fingernail or a flat plastic tool. The bracelet section slides free without any pushing or hammering.
- Reassembly is the reverse: align the spring bar ends with the lug holes and press until you hear a click.
Verification checklist after any reassembly:
- All pins sit flush with the link surface.
- No link wobbles or gaps when you flex the bracelet.
- The clasp is centered between the two halves of the bracelet.
- The bracelet bends smoothly with no stiff spots.
Can you remove watch links without any tools?
Technically, yes — but the risk goes up significantly. A push pin, sewing needle, or small nail can substitute for a pin pusher in an emergency. The problem is control: a needle has no flat face to center on the pin, so it slips sideways easily and scratches the link surface.
If you have no tools available and need a temporary fix:
- Place the bracelet on a folded cloth over a hard surface.
- Position the needle or push pin directly on the center of the link pin.
- Apply very light, vertical pressure — no hammering. Push only far enough to partially eject the pin.
- Stop there. Finish the job with a proper pusher when you have one.
Red flags that mean you should stop immediately:
- The screw won’t turn after firm pressure (seized or threadlocked).
- There are no visible arrows and no screw slot (proprietary mechanism).
- The pin is bent or deformed partway through.
- The bracelet has enamel, ceramic, or resin links.
- The watch is under an active manufacturer warranty.
Any of these conditions means the risk of permanent damage outweighs the convenience of DIY. Stop, set the bracelet aside, and take it to a watchmaker.
How to fine-tune fit, balance the clasp, and do a final check
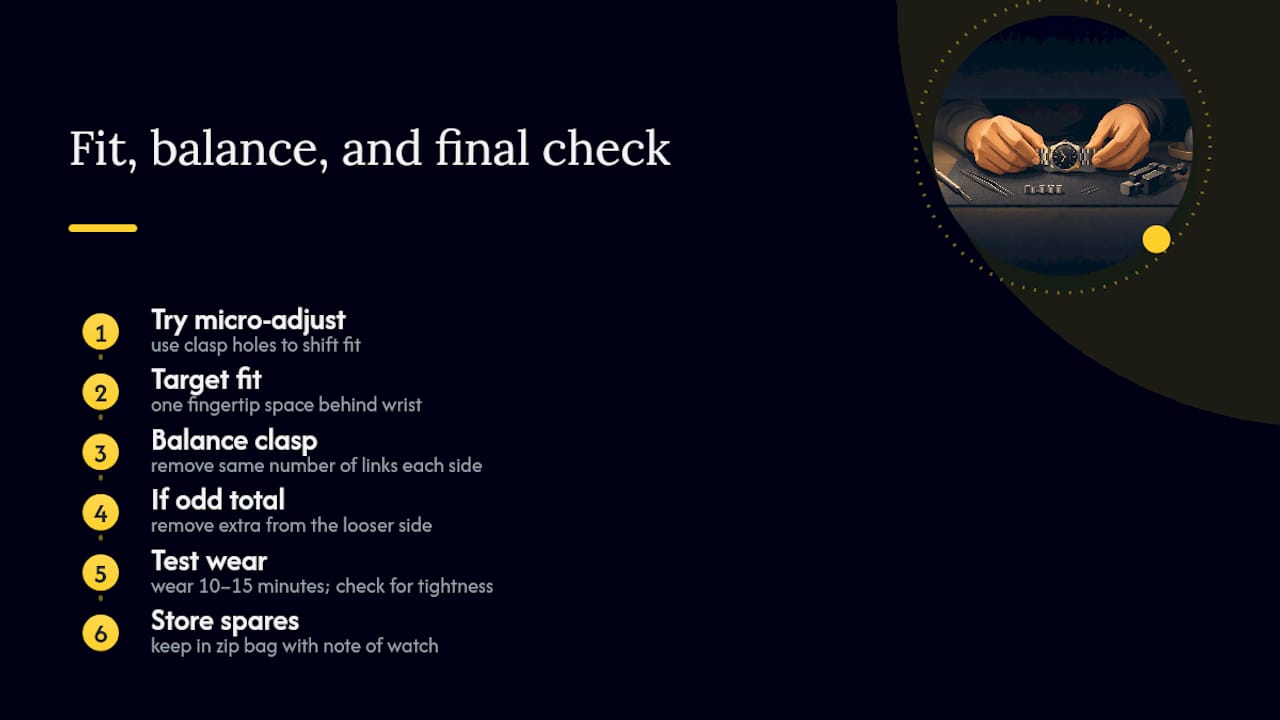
Before removing any links, try the micro-adjust positions built into the clasp. Many bracelets include micro-adjust holes in the clasp that shift the fit by a few millimeters without any tools at all. If the bracelet is only slightly loose, a clasp adjustment solves it in seconds.
When you do need to remove links, the fit target is one fingertip of space between the bracelet and the back of your wrist. Snug enough to stay in place, loose enough to slide slightly when you raise your arm.
Balance the clasp. Remove the same number of links from each side of the clasp. If you need to remove an odd number total, remove the extra link from the side that feels slightly looser. A clasp that sits off-center is uncomfortable and looks wrong.
After reassembly, wear the watch for 10–15 minutes before declaring the fit final. Wrists swell slightly during the day, and a bracelet that feels perfect cold can feel tight after an hour of activity. Store any spare links in a small zip bag with a note of which watch they came from.
For more on comfortable daily wear, the guide on how to prevent watch rash covers fit-related skin irritation and what to adjust.
Common mistakes and how to fix them
- Wrong driver size on screw links. A driver that’s too narrow rocks in the slot and rounds the edges. Fix: match the driver width to the full slot width before applying torque. If the screw is already rounded, a rubber band placed over the head adds grip for one more turn.
- Removing all links from one side. The clasp shifts toward the removed side and sits off-center. Fix: count links removed from each side and keep them equal.
- Pushing pins against the arrow direction. The pin jams instead of sliding out. Fix: flip the bracelet and push from the correct side. If the pin is now stuck partway, push it back to its original position and start over from the right direction.
- Losing a collar. The bracelet can’t be reassembled without it. Fix: work over a tray every time. If a collar is lost, contact the watch brand or a parts supplier for a replacement — collars are often brand-specific.
- Partially ejected pin that won’t go back. Use flat-nose pliers wrapped in tape to press the pin back flush. Apply even pressure across the full pin face, not just one edge.
Warranty note: Opening or modifying a bracelet on a watch under an active manufacturer warranty can void that coverage, depending on the brand’s terms. Check your warranty documentation before starting, or ask the retailer to perform the adjustment. For guidance on what warranty terms typically cover, the article on watches with lifetime warranty explains what buyers should verify before any modification.
When should you take the watch to a professional?
Some jobs are straightforward DIY. Others need a watchmaker. Here’s how to tell the difference.
Go to a pro if:
- The bracelet is from a luxury brand with a proprietary link system.
- Any screw is stripped, seized, or shows signs of threadlocker you can’t break free.
- The pins are bent or the links are cracked.
- The bracelet uses enamel, ceramic, or resin links.
- You don’t have steady hands or the right tools.
- The watch is under an active warranty and the brand requires authorized service.
A basic link removal at a US jeweler or watch retailer typically runs $10–$20. Authorized brand service centers may charge more but use brand-specific tools and preserve your warranty. Bring the watch in its original box if you have it, along with any spare links and proof of purchase.
Watchmaker Tom Hayes and other professionals recommend brand-authorized service centers for luxury or unusual bracelets to avoid scratches or structural damage that DIY tools can cause to high-end finishes.
Wynwoodblvd customers can reach out through the brand’s contact page for sizing guidance or to ask about adjustments before or after purchase.
Expert tips from watch technicians
These rules come from practicing watch repairers and are worth reading before you touch the bracelet.
- Remove one fewer link than you think you need. Incremental removal is standard watchmaking advice — you can always take out another link, but repairing a damaged one is difficult and sometimes impossible.
- Always work over a tray. Pins and collars are small enough to disappear into a carpet or floor crack in one bounce.
- Match the screwdriver to the screw. A driver that’s even slightly too narrow will round the slot on the first turn.
- Center the pusher before every tap. Misalignment is the most common cause of scratched and deformed links — confirm the tip is centered each time, not just at the start.
- Work in good light. A magnifying glass or a phone camera in macro mode lets you see the arrow direction and pin position clearly before you commit.
Pro Tip: If you’re unsure whether a pin is fully seated after reassembly, run your fingernail across the link edge. A proud pin catches your nail. A flush pin doesn’t.
A note on why patience matters more than tools
The biggest mistake in DIY bracelet resizing isn’t using the wrong tool. It’s rushing. A bracelet that’s one link too short is uncomfortable to wear and difficult to fix without sourcing replacement parts. A scratch from a slipping pusher is permanent on a polished finish.
The approach that protects both fit and resale value is the same one watchmakers use: go slow, remove one fewer link than you think, and verify the fit before removing more. A watch in good condition holds its value. One with scratched links or a rounded screw does not.
At Wynwoodblvd, every stainless steel watch is designed with wearability in mind — and that includes the bracelet. Taking the time to resize it correctly means you get the fit and the finish you paid for.
Prefer professional sizing? Wynwoodblvd has you covered
If you’d rather skip the DIY process entirely, Wynwoodblvd offers direct support for sizing questions before and after purchase. Every Miami-inspired stainless steel watch in the collection ships with a standard bracelet length, and the team can guide you on sizing before your order ships.

For readers who want a watch that arrives ready to wear, the Atlantic Blue Automatic Watch and the Everglades Green Automatic Watch are both available with sizing support at checkout. Contact Wynwoodblvd directly through the website to request a pre-shipment sizing consultation or to ask about the return and warranty policy before making any bracelet modification.
Sources
- How to Take Links Out of a Watch | Step-by-Step with Proof
- How to Size a Watch Bracelet and Remove Links Yourself | WatchPolice
- How to remove watch links at home, according to a very trustworthy expert | British GQ
- Watch bracelet sizing guide — remove links
- How to shorten a watch bracelet